Monday, November 21, 2022


Lecture at this year's Richard O Schuster DPM Memorial Lecture

The Photo is from my lecture at this year's Richard O Schuster DPM Memorial Biomechanics Seminar on Subtalar Joint Neutral Position and its clinical significance.

The Speakers from Left to Right: Jinsup Song DPM, PhD, Howard Dananberg DPM, James Losito DPM (program coordinator at Barry University in Florida), R. Daryl Phillips DPM, Richard Blake DPM, Jeff Cusack DPM, Joseph D'Amico DPM (seminar director), Russel Volpe DPM, R. Paul Jordan DPM, Paul Coffin DPM, Barbara Reseque DPM, and Samantha Landau DPM
Sunday, November 20, 2022
Rehabilitation of Injuries: Magical 80% Rule
Injury Rehabilitation: The Magical 80% Rule
80% is not 100% or 99% or 95%, but is the most talked about number in sports
rehabilitation. Why? When you look at the pain scale, the numbers are graded
from 0 to 10, with 10 being agonizing pain and 0 no pain. With most injuries,
it takes 20% of the overall rehabilitation to reduce the symptoms 80% (normally
between 0 and 2), and another 80% of the overall rehabilitation to knock out that
remaining 20% (to daily 0 with no re-flares). Therefore, sports medicine
providers attempt with most injuries to reduce the symptoms to between 0-2 (80%
better) and hold the symptoms there for a long time. The patient still has some
symptoms as they get back into activity. It can be quite unnerving to some
patients to still be experiencing pain while re-attempting to participate in an
activity. However, since it takes 20% of the overall rehabilitation to get
there, and for simplicity let us say it took 2 months to reduce the pain from
8-10 down to 0-2, then it will take 80% of the time (8 more months) to
completely eliminate all the pain. If we wait for no pain to begin activity,
the wait is much longer than necessary, and the body gets stiffer, weaker, more
deconditioned, and overall, more vulnerable to re-injury when starting up
again. So, 80% reduction in symptoms down to levels 0 to 2 pain is considered
the gold standard in treating injuries. Golden Rule of Foot: When 80% of symptoms are reduced, and normal walking occurs without
limping, a return to activity program can be initiated. This is the 80% related to the pain scale.
But, what about the 80% related to activity. 80% better for function is when
you can start running again. Running is the basis of almost all athletic
endeavors. The way I look at and discuss with patients the function scale is:
0 to 20% bed ridden,or non weight bearing on crutches or a knee scooter
20 to 40% from beginning to bear weight to off crutches (normally needs
removable boot/cast)
40 to 60% Gradually feeling less pain with walking with or without boot
60 to 80% Walking with increased speed with mild symptoms, beginning to do
sports specific activities like volleying in tennis, or shooting around in
basketball
80% Passed the 30 minute hard walk test without set back, can begin a walk/run
program, can begin to play sport with some idea of gradation back into full
activity.
It is the magical merging of these two 80%
scales that will allow the patient to begin their sport at a high level and
begin to feel normal again psychologically. Many patients the scales don't match for a while and the health
care provider must have them wait. For example, many patients have 80% pain
relief by icing, medications, activity modification, braces, orthotic devices,
etc., but when they attempt to walk hard for 30 minutes (standard test), or
attempt sport specific activities like solo volleying in a squash court, they
have definite increase in symptoms. They are still in the 60-80% range of function.
This is the time that physical therapy, injections, changes in orthotic
devices, chiropractic, acupuncture, etc., is utilized to get their function off
this plateau and onto the 80-100% plateau where they can dramatically increase
their activities. A good sports medicine provider is very skilled at this task
of raising the plateau. Since the 80-100% plateau can be filled with re-flares,
minor setbacks, and many good pain/bad pain decisions, it can be the most
difficult and challenging time in treating active patients. It is in this time
period that most treatment of all the possible causes of the problem
occur---short legs, flat feet, lordosis, weak muscles, tight muscles, dietary, etc., etc., etc. It is the fun part of rehabilitation.
I hope this post explaining the magical 80% rule used by most in the
rehabilitation world has been helpful. Do not wait until you have no pain to
begin to exercise you love, but there is so much thought that goes into on how to return to
activity during this 80-100% prolonged plateau safely. Good luck!!
Friday, November 18, 2022
Tuesday, November 15, 2022
Basic Gait Findings to Assess Walking Patterns
Basic Gait Findings
( ) Head Tilt
( ) Shoulder Drop
( ) Asymmetrical Arm Swing
( ) Limb Dominance
( ) One Hip Higher
( ) Low Back Structure
( ) Asymmetrical Hip Motion
( ) Asymmetrical Knee Motion
( ) Smoothness of Weight Transfer
( ) Signs of Poor Shock Absorption
( ) Heel Lift Issues
( ) A Propulsive Push Off
( ) Digital Clawing
( ) Angle of Gait Asymmetry
( ) Angle of Gait Position
( ) Summary Right Side
( ) Summary Left Side
Monday, November 14, 2022
Lifts for Short Leg Syndrome
Short Leg: Heel Lifts
vs Full Length Lifts

The 8 common biomechanical categories used in the treatment of
injuries are:
1.
Short Leg Syndrome (discussed here)
2.
Poor Shock Absorption
3.
Excessive Pronation
4.
Excessive Supination
5.
Tight Muscles
6.
Weak Muscles
7.
Miscellaneous Gait
Abnormalities (ie Drop Foot, Polio, etc)
8.
Combinations of the
Above
Since we are going to talk about lifts I thought I would give
your spirit a lift first. I wish to express my gratitude to photographer/artist Robert Stallard for this breathe-taking view of San Francisco Golden Gate Bridge
near sunset on one of our cold, foggy San Franciscan summer days.

The heel lift is the main method used in treatment of short legs and their problems. But, heel
lifts are inherently unstable, and easy for patients to compensate for by
simply bending the knee on that side. Once you bend the knee on the side you
are trying to lift, you have lost the correction. Heel lifts, therefore, can
make the foot/ankle more unstable by lifting up in the shoe more, and they can
make the knee more unstable by producing greater knee bend/flexion.
Doctors are always placing the lift onto an orthotic device.
This is not advisable. First of all, it makes it hard to decide what symptoms
are related to the lift, and what symptoms are related to the orthotic device,
when pain increases with orthotic devices. Secondly, because of the instability
mentioned above, the heel lift may negate the added stability produced by the
orthotic device. Golden Rule of Foot: Keep
orthotic devices and lifts for short legs totally separate.

Full length lifts in the treatment of short leg syndrome are much
more stable and produce better symptom relief. Full length lifts need to lift the heel and forefoot (metatarsal
area), normally equally when 1/4 inch or less, then taper at the toes. This full length lift above, designed
around a shoe insert template for W9 (women's size 9), is actually cut off at
the toes to give room in the toe box area. Imagine all of the athletes who run
up on the ball of their feet, but need a lift for their short leg. How could a
heel lift do anything positive for their biomechanics and symptoms?
At least 50% of the time most athletes are on the ball of the foot while
exercising, so a full length lift seems ideal for the athletic population. Now
athletes on the other hand would love the lift to be only under the heel for
convenience and shoe fit, but it is so much better to have it full length for their biomechanics.

If you use full length lifts, make sure you make cuts into the material by the ball of the
foot to help with smooth push off. This is
especially true as you get up over 1/4 inch in lift. Material under the ball of
the foot can make it hard to move through, so cutting to increase bend, along
with beveling and thinning slightly can all help. You can also see that the
front edge of the full length lift is bevelled or skived to make a smoother
transition forward. When I am using full length lifts, I always try to get
feedback from the athletes on how easy it is to move through their foot. In
podiatry talk, I am trying to avoid Sagittal Plane Blockade.

You can see the cuts do not go through the
sides to help with its durability, but they do go
completely through from top to bottom.

Not really demonstrated well, but these cuts do improve the bend of the foot making it easier to move gently through to the
toes. When you use lifts over 1/4 inch, it is common to use a greater transition from heel to toe. Typically for 3/8 inch lifts I will use 3/8 inch in the heel, 1/4 inch in the forefoot/metatarsals, again tapered to the toes as one example of this progression.
Saturday, November 12, 2022
Single Leg Balancing: Important for All Lower Extremity Injuries
Single leg balancing is mandated to everyone with bad ankles in my practice. It is a 2 minute single foot pose done in the evening to fatigue the ankle. The mechanical function is to both strengthen muscle/tendons, but wake up the neuromuscular connections for a reactive ankle responsive to slants, tilts, and cracks in the sidewalk. You need to always make it somewhat difficult or challenging by standing in shoes or barefoot, standing in the middle of a soft pillow or exercise disc, closing your eyes at times, or moving your hands with or without objects. The goal is to keep challenging yourself. The goal standard remains 2 minutes of single leg balancing with the eyes closed, yet only a few of my hearty patients get there.
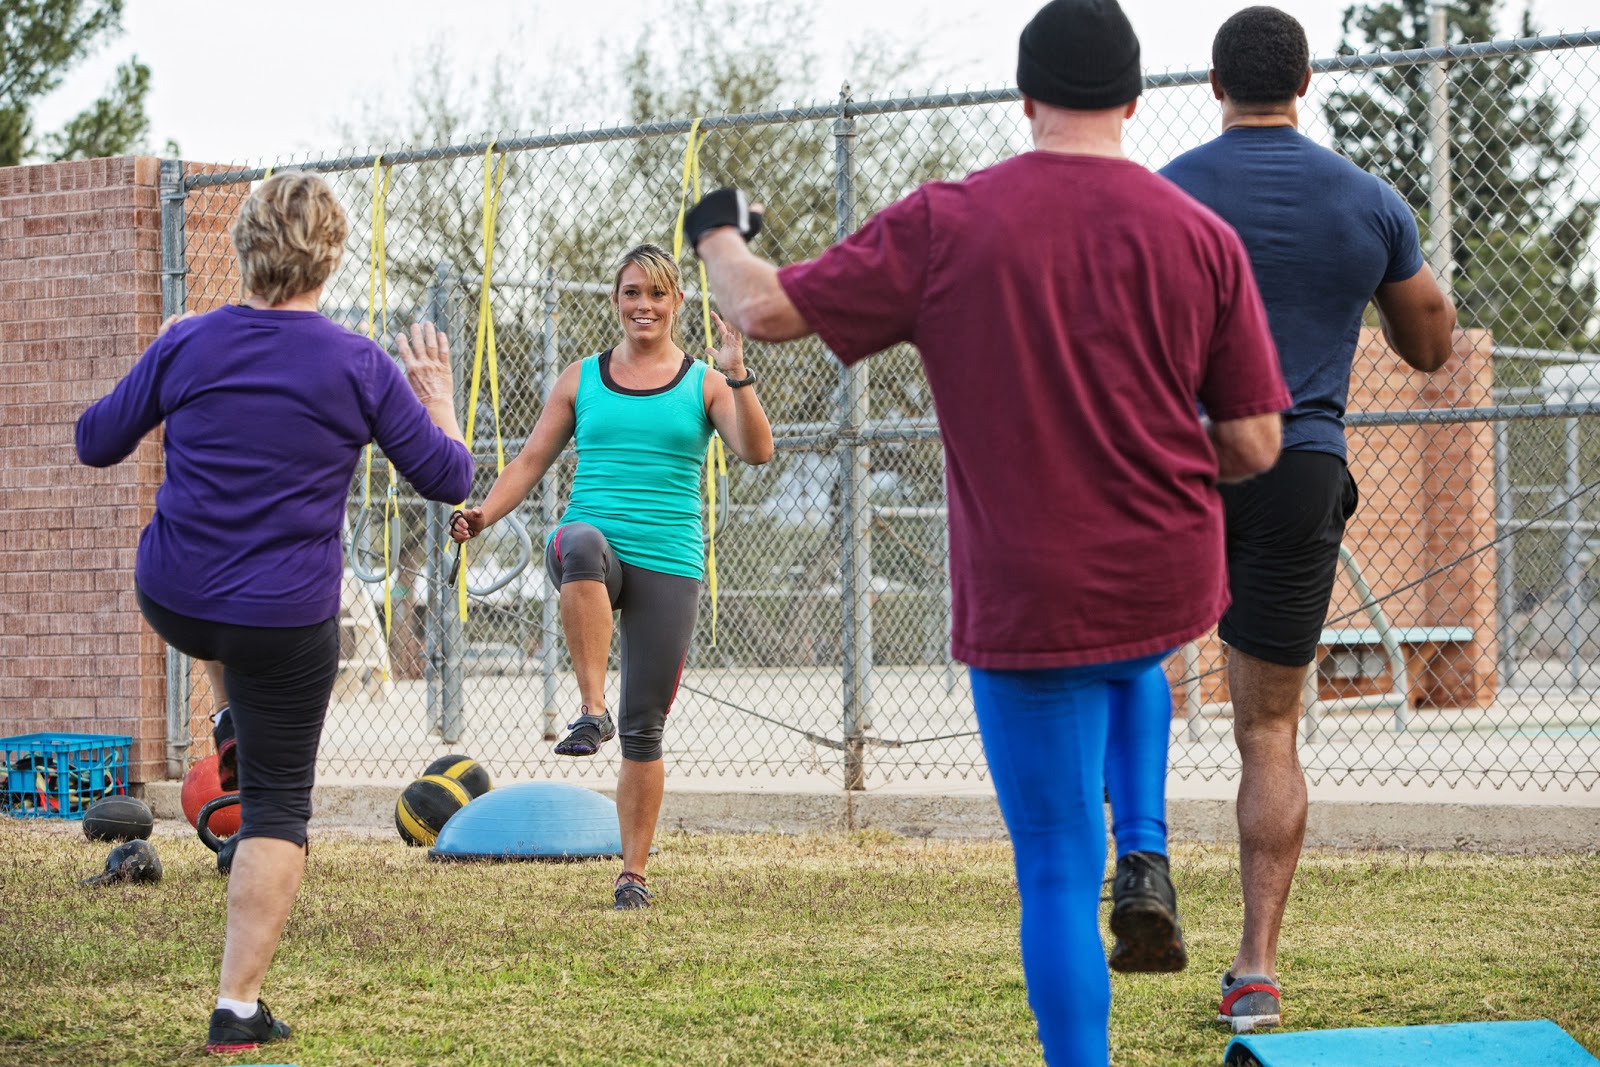
Every patient should have a single leg pose or exercise in their daily exercise regimen
Practical Biomechanics Question #346: Single Leg Balancing is a common exercise taught for ankle, knee, hip and low back rehabilitation. How long are these positions typically held?
Excerpt from the Upcoming: Practical Biomechanics for the Podiatrist Book 3
Friday, November 11, 2022
Swollen Heel Bone: General Thoughts around a Calcaneal Stress Fracture
Calcaneal (Heel Bone) Stress Fractures: A
Cause of Significant Persistent Heel
Pain
By Richard
L Blake, DPM
Heel stress fractures present the same way as plantar fascial tears. They present with swelling, typically an acute onset, and pain level in the 4-6 range or more. However, unlike plantar fascial tears, they may develop slowly probably progressing from a bone bruise, to stress reaction, and finally stress fracture. They do not show up on x ray normally, making an MRI or bone scan typically needed to confirm. Like plantar fascial tears, if this is suspected, and getting test confirmation is difficult to impossible, it is important to treat it as if it was a stress fracture. You do not want a calcaneal stress fracture to develop into a full fracture (typically needing surgery with some permanent disability possible). If you squeeze the heel from both sides, and you (the patient) is very sore compared to the other side, you may have a stress fracture. If you walk on your heels only for 3-4 steps, and you have excruciating pain, you either have a plantar heel bursitis or calcaneal stress fracture.
The top 10 treatments
for calcaneal stress fractures:
1. 3 months removable boot and EvenUp on the other side (and many times the heel bone has to be floated for off weighting with 1/2 adhesive felt under the midfoot and forefoot only))
2. 1500 mg calcium and 1000 units Vit-D3 daily
3. Bone density test if any question on why heel
broke (did not make sense?)
4. Vit-D3 level if any question on why heel broke (or if your dietary intake is low, and you do not get much sun exposure without sunscreen). This is especially true when the stress fracture occurs in the winter months)
5. Custom or OTC orthotic device to produce the effect of a soft
heel and weight transfer into arch
6. Ice pack 2x/day
7. Contrast bath each evening
8. Activity modification to maintain cardio
9. No NSAIDs like advil or aleve (slows bone healing)
10. Exogen bone stimulator for 9 months (if the
diagnosis is confirmed by MRI as x-rays are not great for stress fractures)
Patient
presents with swelling under the heel bone. There is pain produced on side to
side compression of the heel bone during physical examination. X-rays normally
are inconclusive. The patient does not have to have a story of landing hard on
the heel. Onset of pain normally occurs over a short time (acutely), whereas
plantar fasciitis (more commonly a cause of heel pain) has a typically gradual
onset of the pain, worsening slowly over a month or so. The typical
differential diagnosis with significant heel pain with swelling is calcaneal
stress fracture or plantar fascial tear, with some arthritic conditions much
more rare.
An
MRI is the conclusive test. It is important to note how close the stress lines
are to the subtalar joint. The closer to the subtalar joint, the more
consideration of non weight bearing 8 weeks of permanent casting (yes, a real
cast). This is totally devastating to a patient, so avoid when possible. The
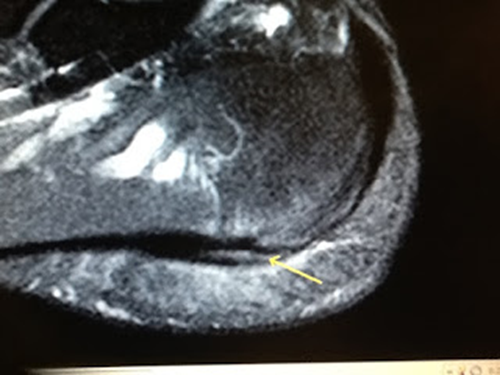
following are 4 MRI’s for patients with heel pain, each with different
findings.
 |
|
This MRI showed the bone
swelling above the bottom of the heel bone due to a tear in the plantar
fascia. You can see the intense swelling above and below the plantar fascia.
This is not the pattern of swelling of a calcaneal stress fracture. A small
blood vessel is seen running through the heel bone which can look like a
stress fracture. If it was there would have been reactive bone changes around it
eliminating that nice tortuous pattern. |
 |
|
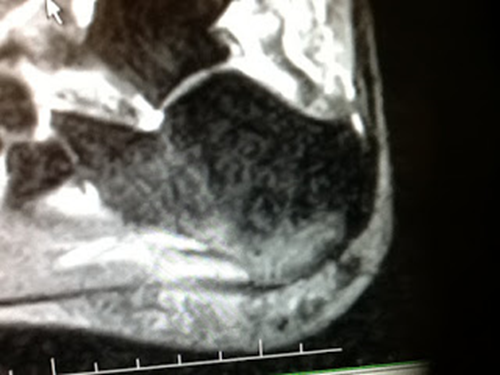
This is a tremendous
bone reaction from a calcaneal (heel bone) stress fracture that runs from the
bottom to the top of the heel to the subtalar joint. A permanent non weight
bearing cast for 4-8 weeks could be easily recommended to protect the joint.
This particular patient would have mentally lost it, so I did treat this with
a removable walking boot. She has done well, but did take longer than normal.
|
 |
|
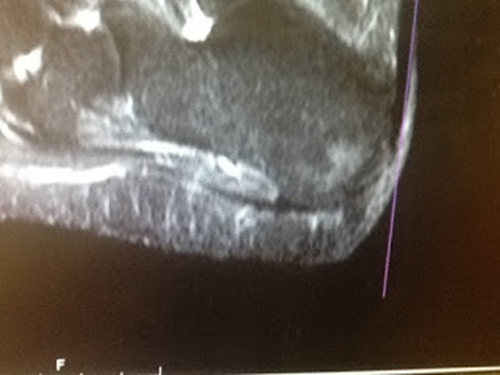
Same patient from just
above is 3 months into her treatment, still very sore, with still bone
swelling within the heel bone. As long as there is bone swelling, there will
be pain (like the pain you get from a sinus headache, although you never have
to walk with full body weight on your sinuses). I never created a good pain
free environment for multiple reasons, so the typical 3 months of
immobilization actually lasted 6. She was however able to do intense spin
classes and swim without problems during this time. We consciously as a
physician and patient team, traded early function for a potentially longer
rehabilitation period. |
 |
|
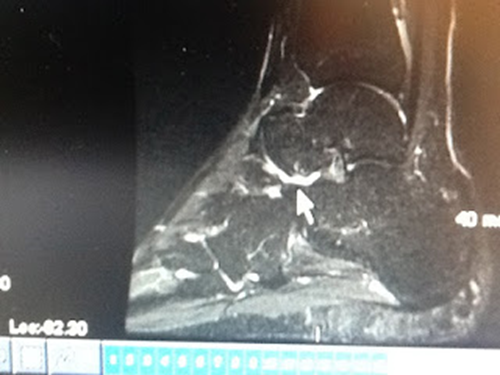
Normal heel bone with organized
blood vessels. |
Once the diagnosis is made, here is a checklist of
events that should happen:
- Questions should be asked about bone density issues,
dietary habits, activity levels leading to overuse, selection of shoe
gear, and past history of fractures.
2.The patient
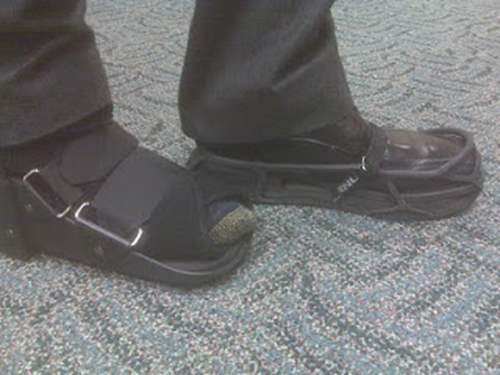
should be fitted for a removable walking boot, unless concern that the
fracture goes too close to the subtalar joint. If the fracture is deemed needing non-weight bearing, a permanent cast is normally used for 4 to 8 weeks. I use a
1/2 inch accommodative pad to float the heel of the walking boot, and tend to
use a below the knee cast over a shorter one. An EvenUp is used on the other
shoe.
3.Over the first 2
weeks post diagnosis, you strive to create a pain free environment. The ease or
difficulty in creating this pain free environment is an important clue on how
serious the problem is. The average patient needs to be in the removable cast
for 3 or more months once the pain free status is attained.
4. Activity modification
is crucial at this time. Bike and swimming are commonly used to maintain
cardio, especially if a removable boot is used. Floor exercises for strength
and flexibility are recommended. Pilates is a great source of these exercises.
5.Sole, PowerStep, or PureStride OTC
orthotics are used within the cast (and later in the shoe gear) to produce
heel padding and weight transfer into the arch.
6.Contrast baths
once or twice daily are vital at reducing heel bone edema (swelling). Swelling
within the bone should be minimized since it actually can reduce the normal
blood flow important for healing. This can slow healing.
7. A Bone Stimulator for 6 to 9 months is used. I actually stop 2 months after full activity is resumed. I use Exogen ultrasound for this, but there are other good stimulators. For insurance, since there are no fracture gaps in a calcaneal stress fractures, many will not cover.
8. The Primary
Care Doc should discuss all the factors that affect bone healing including the
right amounts of calcium, Vit D3, and other minerals. With bone injuries, I
have the patients minimize their use of NSAIDs (like advil, etc).
9. Monthly return
visits can be scheduled for a while to monitor the progress and make changes.
 |
|
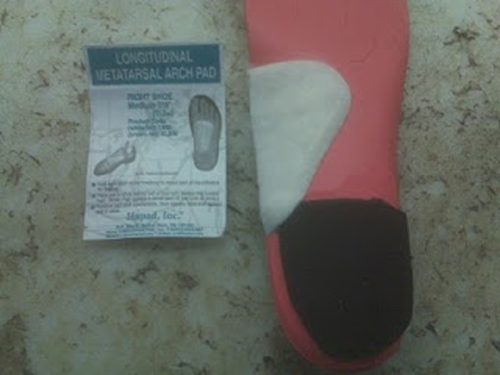
Sole OTC inserts with
extra cushion in heel and extra Hapad arch support to transfer weight into
the heel. |
10.
One month after the diagnosis, the patient is normally casted for custom
fitting soft orthotics. I use the Hannaford technique, but most professional
orthotic labs have their versions that can/are similar. These are dispensed in
1-4 weeks depending on the need to see that patient (if the pain free
environment is established already, waiting 4 weeks to dispense the new
orthotic devices is probably fine).
 |
|
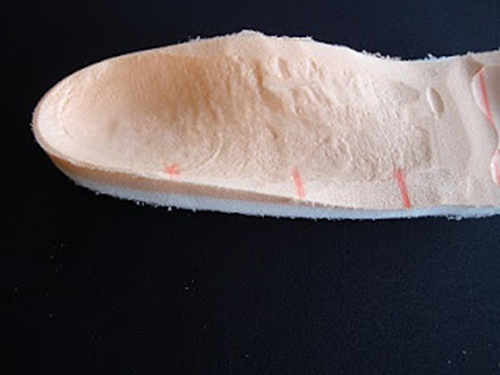
This
shows the memory foam of a Hannaford soft based custom orthotic device. |
11.
One month later, normally now 2 months post diagnosis, physical therapy can be
started to decrease inflammation and work on the damaging aspects of casting:
stiffness, weakness, loss of proprioception (balance), and sometimes nerve
hypersensitivity. Physical therapy can be helpful until you are back to full
activity, probably 3-6 months. Most of the time physical therapy can be
effective at 1-2 times per week.
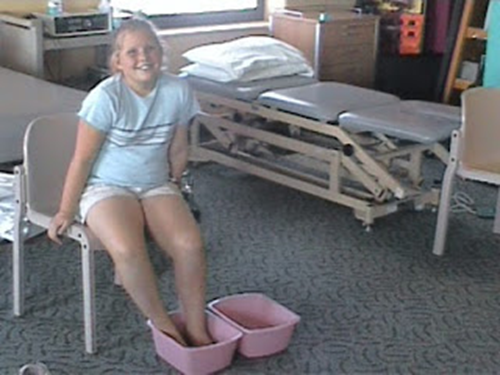 |
|
Patient in physical
therapy doing contrast bathing to reduce bone swelling and its resultant
pain. |
12.
Three months post diagnosis should mean that the patient has been pain-free for
almost exactly 3 months with all of the above treatments. If it was tough to
get the pain level under control, then this landmark may take much longer. It
seems that the patient can successfully wean off the removable boot after being
relatively pain free for 3 months, no matter how long that takes. To
successfully wean off of the boot means that you can not have more pain out of
the boot than in the boot. The removable boot or cast (I use those phrases to
mean the same thing) is initially weaned off by keeping it on at work, and
gradually adding more time out of the boot at home or doing errands. When you
are completely weaned out of the boot for home, gradually spend less time at
work. During this time there can be no increase in pain, you should ice 2 or 3
times a day extra (ice pack 15 minutes to the bottom of the heel), and the
whole process can take 4 to 6 weeks. During this time always have the boot with
you!! You never know when you will need it. Once you are out of the boot full
time, you can gradually increase your activity.
Thursday, November 10, 2022
When Pronation is a Problem: What are the Tools we Have to Help?? Video
https://youtu.be/8WAnph-kP30
Next week the Richard Schuster Memorial Seminar will be held at Barry University in Florida (minus an occasional Hurricane!!) Here is a video of my power pointe on tools we have to help with problems created by excessive pronation from 2019's seminar. Rich
Wednesday, November 9, 2022
Nerve Pain Supplements Commonly Used
1.
Lipoic Acid 300mg 2x/day
2.
Acety-L-Carnitine 2000 mg/day
3.
Inositol 500-1000mg/day
4.
Vit B6 50mg/day
5.
Vit B12 1000mg/day
6.
Vit E (up to 1,600units/day)
7.
Thyroid Natural Supplements
This is a list I give to my patients with any type of nerve symptoms from numbness to pain. They all have had positive responses with lessening of nerve symptoms when taking for 3 months. Typically my patients try one at a time for 2-4 weeks. If there is any improvement, they stay with that one and start another. I tell the patients that they have to feel an improvement, so do not just take them blindly. Rich
Tuesday, November 8, 2022
General Rules Swollen Achilles Tendons
Achilles
Tendinosis and Partial Tears by Richard Blake, DPM
Achilles Tendinosis implies that the tendon is damaged more than inflamed (like in Achilles Tendonitis conditions). Partial Tears are part of this condition that drives everyone, doctor and patient, bananas. There are so many degrees of tendon disease. MRIs, if possible, should always be done to document what is going on. The important physical finding to suspect an achilles injury, more than tendonitis, is the presence of visible swelling. Straight Forward Achilles strains or tendonitis conditions should not have visible swelling.
The top 10 treatments for achilles
tendinosis and partial tears are:
1.
When the tendon is thicker than normal, or swelling that will not
go away, consider an MRI to check if a partial tear is present.
2.
With tendinosis, some form of immobilization is important to
create a pain free environment.
3.
With a partial tear of the achilles tendon, 3 months of cam
walker/removable boot is crucial (when a pain free situation cannot be obtained
with activity modification).
4.
With tendinosis, physical therapy can occur at the same time
as the immobilization, and with a partial tear, physical therapy normally
starts after the 3 months of immobilization.
5.
Both of these conditions may require surgery, so a
surgical consult should be done to evaluate options.
6.
As the tendon gets less sore with icing for 10 minutes 3
times per day, gradually begin to strengthen. I love 2 positional Heel raises
up to 100 each evening as long as there is no pain, gradually leaning to the
injured side, and gradually progressing to 25 one sided heel raises.
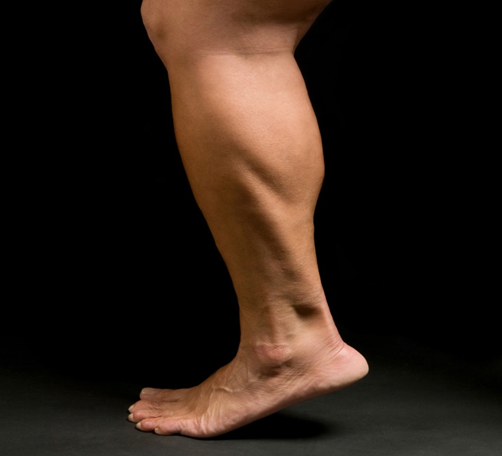
Here a Heel Raise is demonstrated (also called a Calf Raise)
7.
Achilles tendon stretching, both straight and bent knee, should be
done painlessly 3-5 times a day.
8. PRP
injections and Shockwave Therapies are rising stars to hopefully avoid surgery may be considered. At the time of this writing, Stem Cell injections are still not proven to the author.
9.
Like
all cases of achilles pain, heel lifts and custom orthotic devices are
standard to both stabilize the heel and decrease the stress on the achilles at push off. The solid platform of a standard custom made functional foot orthotic device gives incredible power to the achilles by centering the heel under the leg, anchoring the heel, and easing the stress at heel lift on the achilles.
10.
Avoid barefoot and negative heel positions for
a year following the Return to Activity Phase.
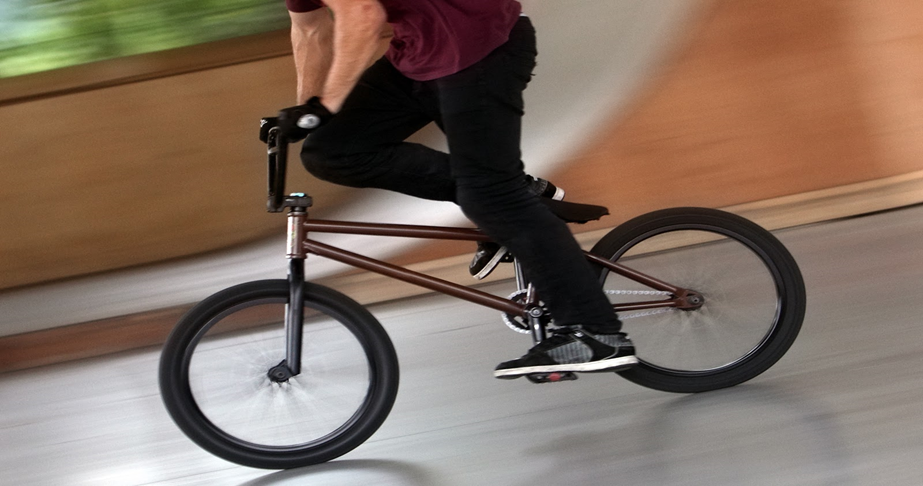
When the heel
drops below the plane of the ball of the foot, it is considered in a negative
heel position, and the achilles can get over stretched and re-torn. In the initial phases of achilles rehabilitation, I prefer to keep my patients in their seats while biking.
Monday, November 7, 2022
General Rules of Posterior Tibial Tendon Injuries
Posterior Tibial
Tendonitis/Dysfunction/Tear (by Richard Blake, DPM)
The posterior tibial tendon is the major tendon to support the main arch of your foot. Damage to the tendon causes arch collapse to a major degree. Any sign that this tendon is having (beginning to have) problems must therefore be over treated to avoid long term issues. It is one of the most common surgeries on my patients because of the disability. I work long and hard on each one of these patients both trying to avoid surgery (usually), or in their post surgical rehabilitation. I encourage you to see my videos on You Tube for posterior tibial tendon problems. On YouTube, type drblakeshealingsole posterior tibial tendon and see what comes up. Rich
The top 10 treatments
for tibial tendinitis/dysfunction/tear are:
1. Understand the biomechanics of the
posterior tibial tendon to support the medial longitudinal arch and begin to
support the arch as part of all phases of the rehabilitation: Immobilization,
Re-Strengthening, and Return to Activity.
2. Start with OTC and advance to custom
orthotic devices with maximal support (this is not an injury to settle with less than
optimal support).
3. Learn several different taping
techniques: posterior tibial and circumferential arch.
4. Ice the area 3 times daily for 15
minutes each.
5. If possible, get a baseline MRI (may be
an important comparison 6 months later).
6. Most ankle braces hold the ankle
pronated which is bad for this injury, consider an Aircast Airlift PTTD brace
for times you are not using orthotic devices.
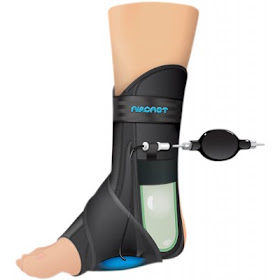
7. Create an initial pain free environment
with below knee removable boot/cam walker, and perhaps a Roll aBout.
8. If the injury is substantial (Grade 3-4
typically), have a hinged AFO custom made at a brace shop right at the start of
the injury (it can take awhile to get fitted)
9. Begin strengthening the posterior tibial tendon as quickly as possible with at least active range of motion exercises. The Posterior Tibial tendon is strengthened by pointing the ankle first and then moving the foot towards the other foot.
10. Definitely have a surgeon as part of the
treatment.
Subscribe to:
Posts (Atom)