Custom Made Orthotic Devices with
Blake Design Improves Arch Structure in Developing Children
·
39
Flat Foot Children studied by x-ray evaluation over 6 years old (average age
10.3, range 6 to 14 years old) for a 2 year period to see if the arch developed
with Blake Inverted Orthotic Design
·
Blake
Inverted Orthotic Design is recognized worldwide as providing the most medial
arch support
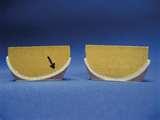
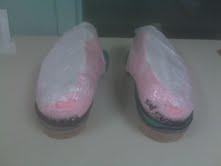
Orthotic
Device cross section standard heel cup (right) and Inverted Technique (left)
Orthotic
devices resting under Inverted molds (typically one foot more inverted than the
other
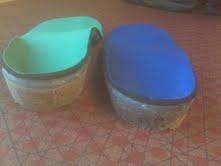
Standard
right arch and Inverted left arch
·
One
study showed that if children were to spontaneously reduce their flat feet (grow
out of it) it would be before 6 years old. Dr Ron Valmassy says it is
predictable at any age, but 8 years old is the gold standard of knowing if they
will grow out of it.
·
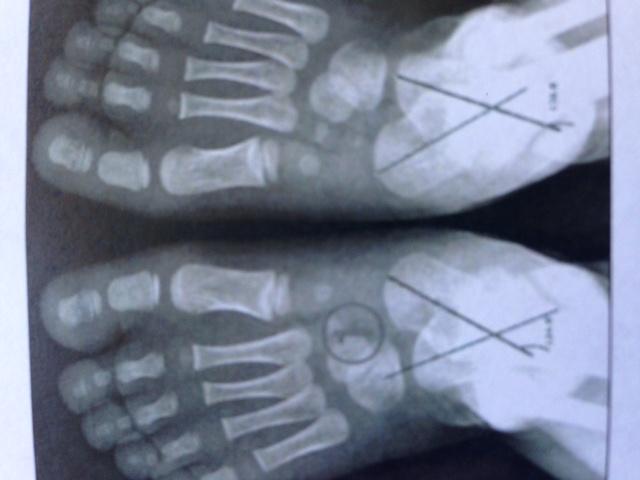
4
radiological angles (which measure arch collapse in the sagittal and transverse
planes) and one standing angle (measuring frontal plane) were measured at the
start of the study, 12-18 months into the study, and at 24 months.
·
Subjects
were required to wear orthotic devices for 8 hours per day minimal
·
Exact
Rx writing was used to individualize the custom orthotic devices based on the
RCSP (Resting Calcaneal Stance Position).
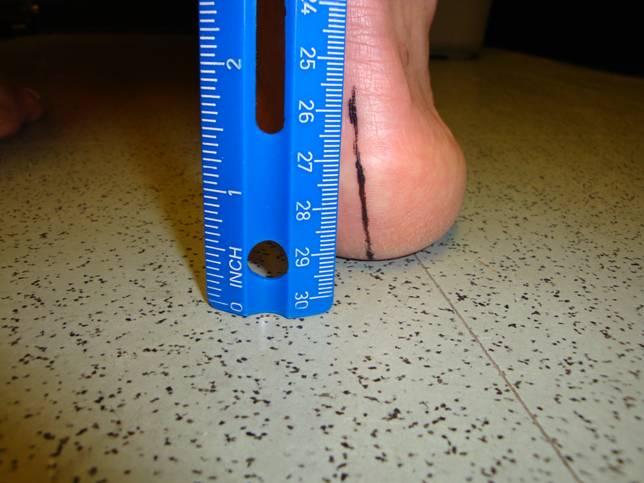
This
measurement, called the resting calcaneal stance position, changed from 8.0
everted to 1.9 everted with orthotic wear over the 2 years, and measures the
frontal or coronal plane component. The ideal is 0 degrees or heel vertical measured exactly with a goniometer.
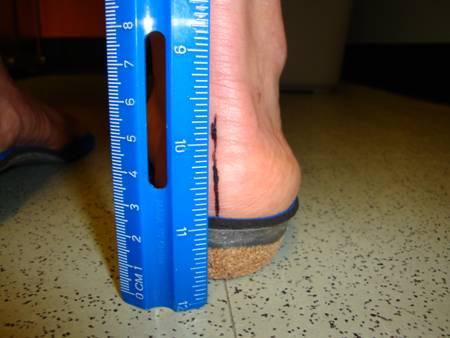

Here the exact angle is being measured with a goniometer.
·
2
of the 5 angles showed significant improvement, 2 of the angles showed improvement,
and one was unchanged (the least predictive one generally)
·
Background
Info: Blake Inverted Orthotic developed here at Center for Sports Medicine
throughout the 1980’s. Dr Blake has lectured nationally and internationally
about the technique. At one point, 17% of all custom made orthotic devices in
Australia were this technique.
·
More
Background: Bias of Pediatricians and Orthopedic Surgeons is that all children
with flat feet will outgrow this, or at least there is no predictability in
selecting children for orthotic devices. Dr Ron Valmassy developed the criteria
in the late 1970s for predicting which children will not outgrow their flatfeet
and also has lectured extensively.
·
Flatfeet:
flexible and rigid. Flexible is the hardest to correct in adults and these were
the ones chosen for the study (typically more ligamentous laxity than a rigid
flatfoot). Flexible flat foot is much more common to see however in children,
and can develop into rigid flat feet after the age of 22 when the adult
ligament and bone structure is fully developed.
AP TCA is decreased as the arch gets better and the foot less splayed out
(Angle 1)
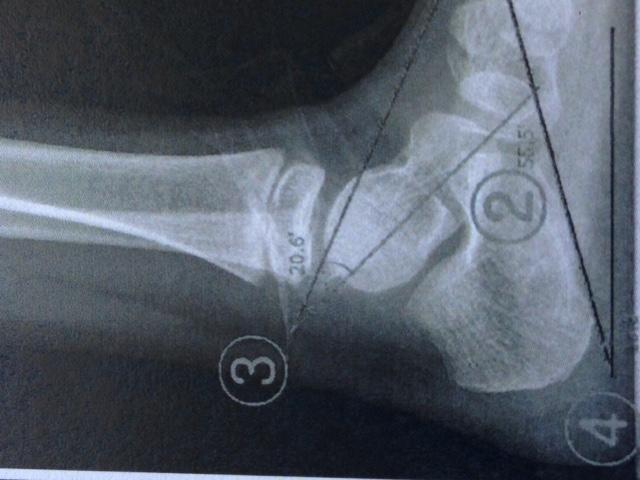
Lateral TCA should get less as the arch improves (Angle
2)
Lateral TMA should get less as the arch improves (Angle
3)
CP should get greater as the arch improves (Angle
4)
·
RCSP
changes 8.0 to 2.6 to 1.9 (less is good)
AP View TC Angle 38.4 to 38.1 to 29.6 (less is good) Angle 1 above
Lateral View TC Angle 47.3 to 49.8 to 47.3 (less is good) Angle 2 above
Lateral TM Angle 17.7 to 18.2 to 10.3 (less is good) Angle 3 above
CP Angle 11.6 to 14.7 to 16.0
(more is good) Angle 4 above
Dr Blake’s comments:
·
Article
used the Blake Design to customize the orthotic prescription typically not seen
in foot orthotic studies (allowing the 5 to 1 rule of cast correction to heel
eversion to create an equal and opposite force to control pronation)
·
The
calcaneus is the best guide since it can be accurately measured in the sagittal
and transverse planes (by the calcaneal pitch) and the frontal plane (by the
RCSP) since it is trapped against the ground. The talus is notoriously a poor
guide since it is influenced by the foot and ankle (and ankle positioning is
not standard with these x-rays).