This following is an excerpt from Book 2 of Practical Biomechanics for the Podiatrist
Plantar Heel Pain Problems
Plantar Heel Pain is presumed plantar fasciitis, end of question, thank you, on to the next topic! Yet, there are plenty of reasons for plantar heel pain like bursitis, plantar fascial tearing or degeneration, heel spurs, intrinsic muscle soreness, stress fractures, bone bruises, neuritis, arthritis, to name the most common causes. Each of these entities can require some of the same treatments, and some other treatments than plantar fasciitis. Because plantar fasciitis dominates the landscape, we have to have suspicions early on that it may not be fasciitis. Most of my patients with plantar fasciitis have the following: worse pain in the morning, onset very gradual over months, no swelling is noted, normal treatments help somewhat (stretching, icing, arch supports), pain rarely over 4-5 on a scale of 0-10, and primarily in the heel where it attaches.
For most clinicians, their treatment like mine will be gradually adding pieces to the treatment. You decide quickly if tests like x-rays and MRI are in order, if the fitting for a Cam Walker is appropriate, or if PT is necessary sooner than later. You do what you can to drive the pain to 0-2 as fast as possible with arch supports, taping, limiting barefoot, and then you have the patient ice and stretch both the achilles and the plantar fascia. After your patient’s feedback, for me that is on a monthly basis, you begin to make changes in all of the modalities listed below.

MRI with normal looking plantar fascia right above my sensor
To tie this into Chapter 3 and 4 on gait and biomechanical examinations, when a patient presents with plantar heel pain problems, the most important examinations to do in 10 minutes (or 20 minutes) are:
- Signs of Pronation Medial Overload
- RCSP
- Equinus with AJDF
- Functional Hallux Limitus
- Metatarsal Alignment (Metatarsus Primus Elevatus)
- Forefoot to Rearfoot (signs of forefoot varus)
- Antalgic Gait
- Side to Side Heel Compression Pain
- Signs of Hard Heel Contact in Gait
Common Mechanical Changes for Plantar Heel Pain (with the common ones in RED)
- OTC and Custom Orthotic Devices
- Heel Cushions
- Avoid Strong heel strike
- Avoid Barefoot
- Avoid Zero Drop Shoes
- Heeled Shoes
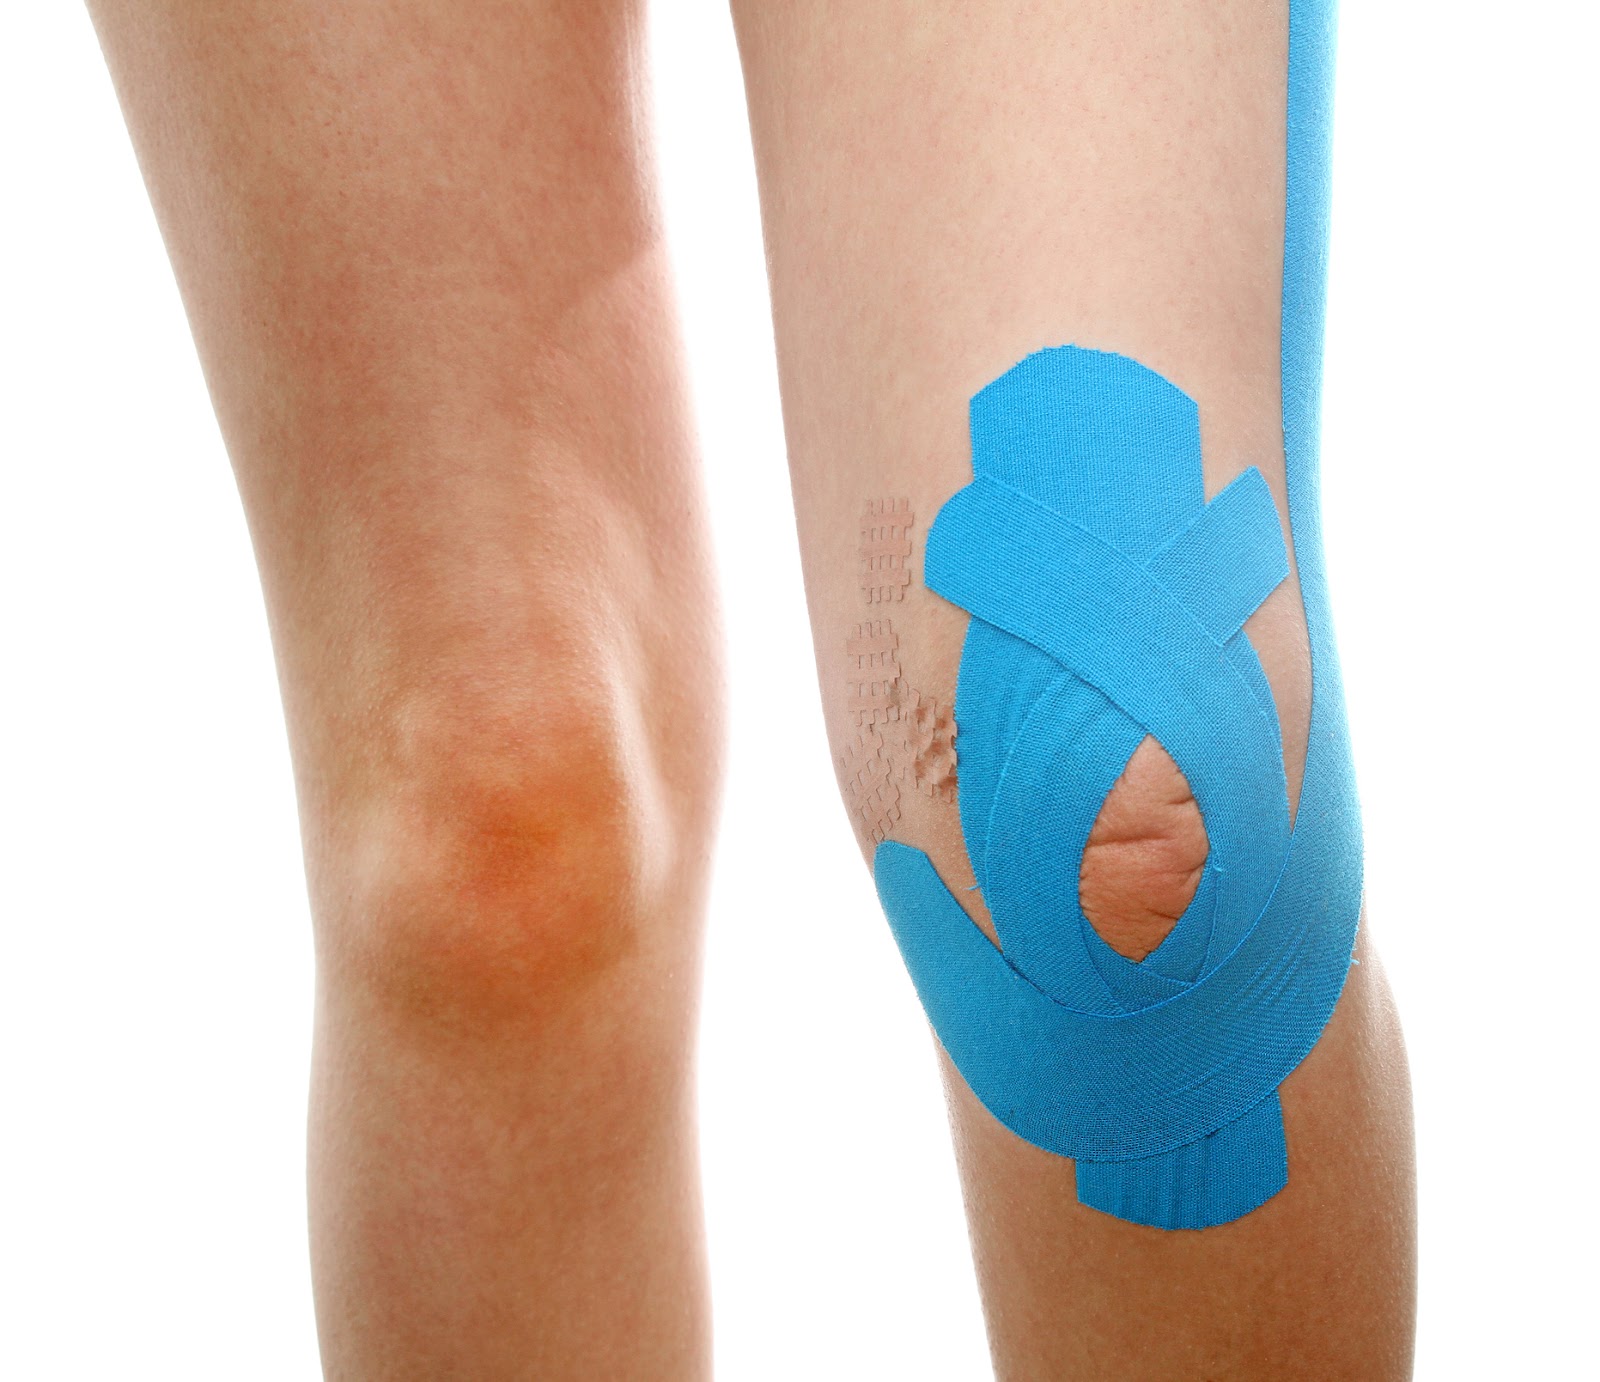
- Taping
- Achilles Stretching
- Plantar Fascial Stretching
- Metatarsal Doming and Single Leg Balancing
- Limitation of Toe Bend
- Physical Therapy Prescription
- Cam Walker with or without Crutches in the Immobilization Phase
- Plantar Fascial Rest Splints
- Plantar Fascia Socks
- Slippers with Arch Support
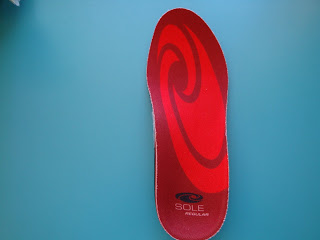
OTC and Custom Orthotic Devices work in many ways to help heel pain. Their mechanical functions vary with all the modifications that can be applied. One of the primary ways is in the mere transference of weight from the painful heel forward into the arch. I like Sole, Pure Stride, or Power Step inserts that can leave my office at the first visit customized with the right arch support, and I typically soften the heel some. I want the inserts protecting the heel and transferring weight to the arch immediately.

Here all the heel hardness has been ground away and replaced with a soft ⅛ inch spenco or poron or neolon pad for extra cushion
Who for and when will I make custom orthotic devices? This will depend on how the patient is progressing with their heel pain, how long they have been dealing with the problem, what their biomechanics are like, and what is their history of possibly biomechanically related problems. If the person on top of this foot with plantar heel pain, who may have only had the problem for a few weeks, but has terrible biomechanics, or long standing biomechanical issues that I can help, we will begin to have a discussion at their first or second visit with me. If the patient’s problem seems related to heel strike only or predominantly, I will consider soft based memory foam Hannafords as my initial custom orthotic device. If their problem seems more related to pronation issues, that a plastic insert will work fine with, I will move into the myriad of orthotic devices that help pronation.
So why are OTC or custom made orthotic devices useful in plantar heel pain? For any individual patient it may be impossible to exactly sort out, but you are trying to affect the following: transfer the weight from the sore heel to the arch (you can see that heel controlling orthotic devices like Inverted or Kirby may not be appropriate in acute heel pain situations), decrease the pull of the plantar fascia on the heel bone, take tension off of the Achilles’ tendon fibers that run into the plantar fascia with some heel lift and heel centering towards neutral), and free up the plantar fascial tension at heel lift by eliminating functional hallux limitus when present. Occasionally I have to remove the extrinsic heel post when there is acute heel pain due to the accumulation of stress on the heel itself caused by the heel post (which may later be put back).
Heel Cushions come in many sizes and shapes, made of foams, gels, low durometer EVAs, etc. Their mechanical function is to soften the heel, and sometimes transfer weight forward off the heel. The goal of all of these is to soften the heel at impact, decreasing the pain. I always experiment with patients with heel pain if they can tolerate heel cushions or not (it is something you should have stocked in your office). I have a range from very spongy to somewhat firm. Heel cushions also act as heel lifts transferring weight forward ideally, and easing the tension off the Achilles’ tendon attachment onto the heel.

Here is a hybrid heel cushion which can both cushion and stabilize by decreasing any heel motion
Practical Biomechanics Question #313: With plantar heel pain, what are the two main functions of an arch support (OTC and custom)?
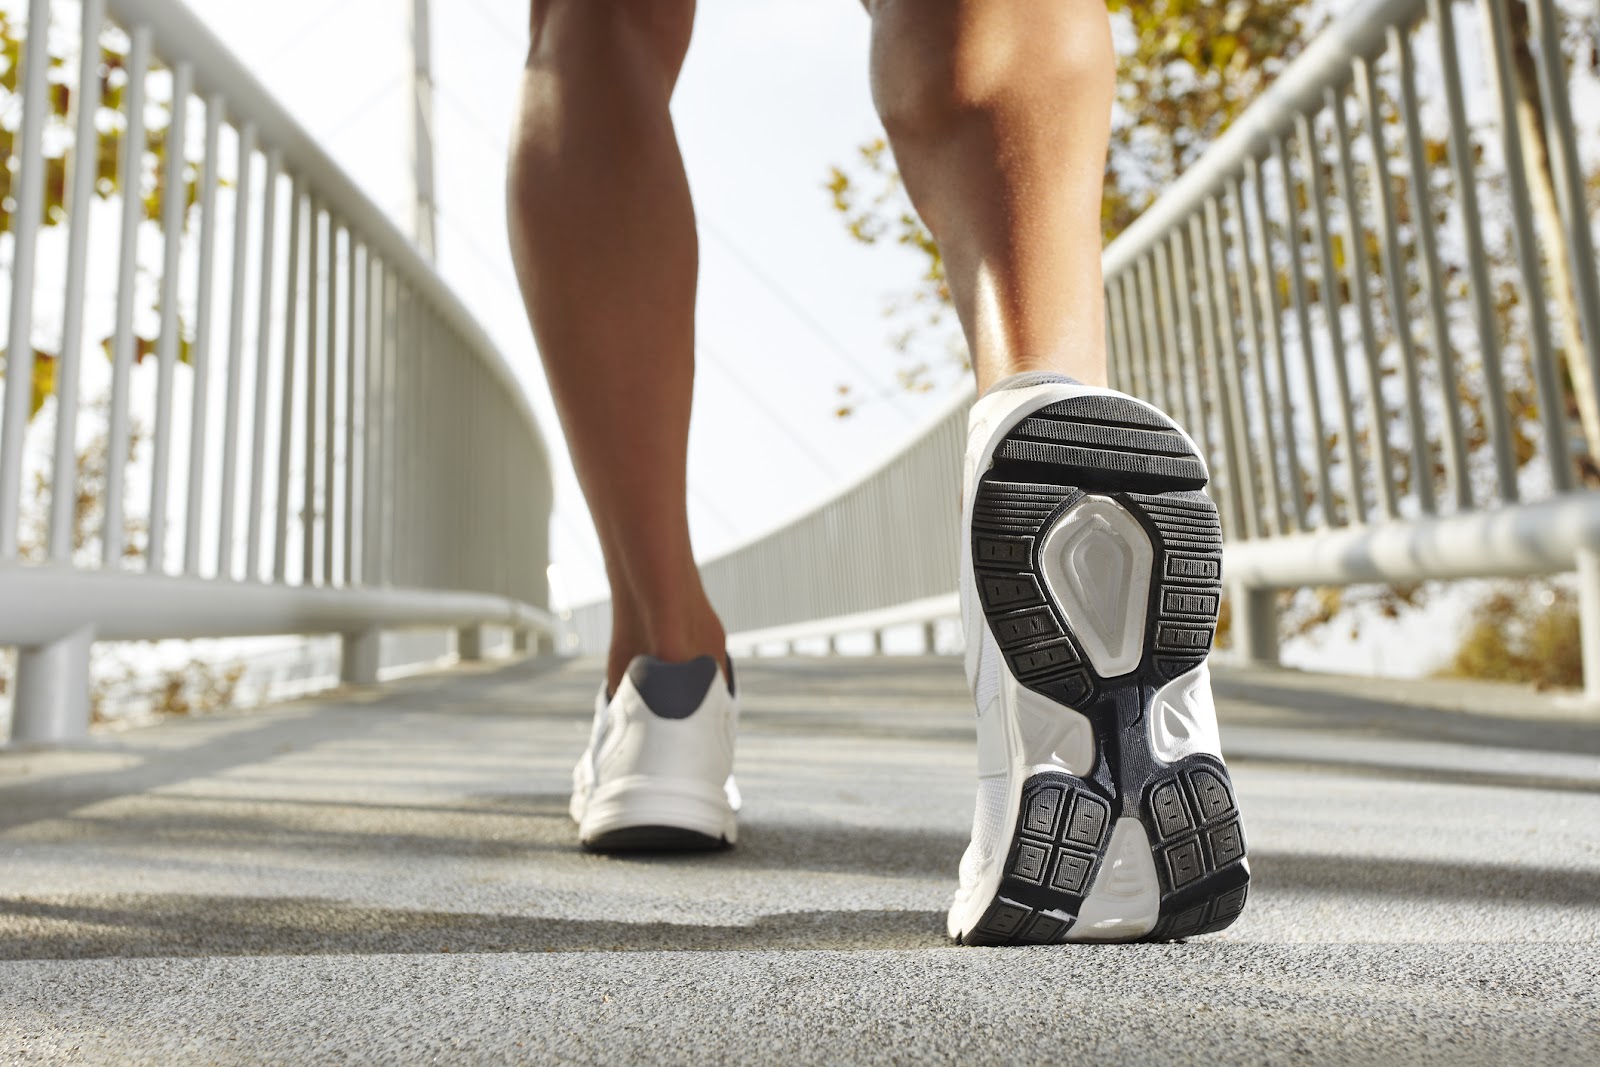
Avoidance of Strong Heel Strike Gait Pattern is another common tool to help heel pain. Its mechanical function is to decrease the stress on the plantar heel. Many patients are strong heel strikers, you can hear them coming, and when they get heel pain, it is a pattern to try to change. You probably will not notice this until well into your treatment when they start walking normally again if they had an acute injury. With running, I can typically get a heel striker to be a full foot striker with some coaching. Try to learn the concept of Chi Running. With walking, it can be very hard, and I usually rely on physical therapists trained in gait to help.

Over Striding is a Common Cause of Excessive Heel Strike that can be helped in coaching
Avoidance of Barefoot is one of the gold standards of plantar heel pain. Its mechanical function is to dampen the stresses through the heel with a layer of material between the heel and the ground. Whatever the cause of the heel pain, going barefoot can keep the heel irritated and not allow healing to occur. Patients with chronic heel pain are very frustrated by the permanence of never going barefoot again. However, as the symptoms calm down, you can initiate flat footed barefoot foot walking, especially on the stairs at home. For awhile, many of my patients wear Oofos sandals as a house slipper for cushion, or even an indoor only athletic shoe with orthotic devices. The podiatrist must ascertain if this is needed based on the amount of barefoot they do, and the aggravation of symptoms produced.
Avoidance of Zero Drop Shoes can only be a general guideline, but the faster you walk, a slight heel is important. Its mechanical function is to prevent overstretching of the achilles at contact, and over stretching the plantar fascia at push off. Zero Drop shoes are all the rage now, but they make the wearer actually more flat footed, staying more on their heels, and then harder to move forward. There is more tension on the plantar fascia and intrinsic muscles as they lift their heels. Many times I have had to use orthotic devices with heel lifts to neutralize this effect on the heel.
Heeled Shoes or Boots are the opposite, at times, of going barefoot or wearing zero drop shoes. Their mechanical function is to transfer weight forward from the heel and decrease tension on the achilles tendon. Here you are trying to use a heel to shift body weight forward enough to take the pressure off of the heel area. Unfortunately, with some heeled shoes, the force is placed too much on the heel, and the heel pain increases (especially with spiked heels!) It is not the softness of the heel that matters in this regard, since Dansko clogs with their hard wooden base is the poster child for this process.
Practical Biomechanics Question #314: What are the pros and cons of a heeled shoe with plantar heel pain?
Taping is another gold standard in the treatment of plantar heel pain. Its mechanical function is in reducing the stress on the tissue that attaches into the heel. It is also the basis of how podiatrists decide if someone should get orthotic devices based on a negative or positive response. This practice is from the early days of biomechanics and should be abolished for there are so many reasons you are utilizing orthotic devices differently than how a specific tape works. I use only two types of taping routinely for heel pain: low dye taping and Quick Tape by
supportthefoot.com. In fact, Quick Tape is used first, and if it doesn’t work, and only if it doesn’t work, I begin the process of trying the many versions of low dye until I find the best version.

Quick tape can stay on for 5-7 days so ideal for backpacking trips, or in the transition from a cam walker into normal activities
Achilles Stretching is another gold standard for plantar heel pain. Its mechanical function is to decrease the stress on the arch structures attaching into the heel. The less achilles tightness, the less strain on the arch, and plantar fascia, in fact the entire foot. I have always considered plantar fasciitis as an inflexibility issue with the achilles and plantar fascia. At times, plantar heel pain is a problem of plantar fascial inflexibility especially with hallux limitus or pes cavus. At times, it is a problem of achilles inflexibility with tightness in the gastrocnemius, soleus, both, or only one. The ability to measure the Achilles’ tendon reliably should be an important tool (described in both Book 1 and chapter 4 of Book 2 here)

Plantar Fascial Wall Stretch with toes bent, heel on the ground, and knee driven towards the wall..
Plantar Fascia Stretching is another gold standard for plantar heel pain. Its mechanical function may be in stretching the tissue around it more than the fascia itself. You are attempting to loosen up the fascial bands with gentle non painful stretches. I love the Plantar Fascia Wall Lean Stretch, and the rolling ice stretch with a frozen sports bottle, but have mixed feelings about the Graston technique used by physical therapists. Part of the problem is that loose tissue can feel tight with nerve hyper innervation due to pain, or swelling may make loose tissue feel tight, or muscle fatigue may make the tissue feel tight. There are some many false positives in muscle or fascia tightness, that I do not think we know this process very well. I prefer simple plantar fascial wall leans or rolling sports bottle stretches to gently pull on this very inelastic structure.
Practical Biomechanics Question #315: Plantar Fascia is a ligament, and ligaments are almost impossible to stretch, so why does this stretch work so well?
Metatarsal Doming and Single Leg Balancing have been discussed at length in this chapter and are crucial to take the strain off the plantar fascia. Their mechanical function is in strengthening the injured tissue. As a reminder, the plantar fascia is the third most important structure for arch support. The most important is the ligaments holding the bones together, the second most important is the intrinsic and extrinsic muscles, and the third most important is the plantar fascia. Every 10-20% stronger that I can make the intrinsic muscles, I am taking a tremendous load off the plantar fascia. Metatarsal doming and Single Leg Balancing are the best, and safest, ways to strengthen those intrinsic muscles.
Limitation of Toe Bend has developed in my practice due to MRI images. Its mechanical function is in reducing the stress on the plantar fascia. So many patients, with chronic heel pain, had degenerative changes seen only on MRI. I placed them on a three month program of no toe bending (with Hoka One One shoes, spica taping, Cam Walkers, Carbon Graphite foot beds, or Bike shoes with embedded cleats) and they did well.

Bike Shoes with embedded cleats are successfully used to rest the plantar fascia by limiting big toe joint bend
Practical Biomechanics Question #316: What are five common ways to restrict big toe joint motion of dorsiflexion?

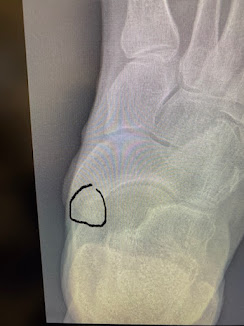
The plantar fascia should be dark black all the way back to the heel bone. This MRI shows a 2 inch section of fascia irregularities from the heel bone forward. Treatment is helped with limiting big toe joint motion for a few months.
Physical Therapy is very common for my patients with plantar fasciitis. I typically write a specific prescription for 8 sessions to start. Its mechanical functions are strengthening, stretching, mobilizing, and activity modification stress reduction and modulations. But, what mechanical help am I prescribing? Of course, physical therapy will always include anti-inflammatory measures, but the four main aspects I ask a physical therapist to help with are achilles and plantar fascia flexibility, foot and overall leg strength, cross training guidelines for the patient, and gait training for the heel strikers.
Cam Walker with and without Crutches for the Immobilization Phase is something you should not forget about. Its mechanical treatment is in complete rest of the plantar fascia when it needs to be immobilized from a tear or symptoms consistently over the 0-2 level. Plantar Fasciitis treatment has to undergo the same criteria of treatment as all other injuries. You must create that 0-2 pain level, and keep it there during the entire rehabilitative course. Sometimes, before an MRI is done, there can be stress fractures or even plantar fascia tearing, that only the Cam Walker can bring the pain down. Many patients get 4 hours a day in their Cam Walkers with EvenUps on the other side just as a means to cool down their injuries as we create a healing environment.
Practical Biomechanics Question #317: Any injury that is so common can tend to be subject to protocols. Protocols do not individualize, so patients can continue to hurt themselves. What pain level is crucial to maintain in injury rehabilitation that almost guarantees great healing?
Plantar Fascia Rest Splints have dominated the landscape over the last 25 years, and now the DeHeer Equinus Brace, which crosses the knee joint, may be a better mousetrap. Their mechanical function is to put a long grade by consistent stretch on the injured tissue. At present, I have limited feedback on the DeHeer, but since it crosses the knee joint, if the knee joint can take the stress, it should work well. All of the plantar fascia braces do produce some relaxation to the tissues, and I think that a patient who has several months of pain (especially in the morning), should begin to wear during the day when they are at rest. It can be an hour at a time throughout the day (while they are working at their desk, eating meals, watching movies, etc.) If the morning soreness is more than a couple of minutes, and if they seem to be tolerating it during the day, they can try sleeping with it. Sleeping is always the best time to heal, so disrupting that sleep at all, should be well thought out if needed.

Classic Plantar Fascia Night Splint with adjustable straps to pull the foot into more dorsiflexion if needed. I rarely feel a need to use these straps at all.
Plantar Fascia Socks are a helpful support, under the regular socks, and routinely sold at athletic stores.
Slippers with Arch Supports, like Teva or Vionic, have been a great help to heel pain sufferers. They can be at the side of your bed when you get up in the middle of the night. For many patients who do not wear shoes in the house, a house-only slipper or sandal, that cushions and supports has been a wonderful compromise.