Total Pageviews

Translate

Followers

Monday, May 31, 2021

Peroneal Tendon and Lateral Ankle Taping: Video Presentation

https://youtu.be/ouGN5pSwUk4

This is a new video on peroneal taping, with my last one in 2017. I go over the application of peroneal tendon and lateral ankle taping with the powerful Leukotape. So many of my patients have been able to wean out of their removable boots, or get off their crutches, faster with this taping. On the blog, I have a similar video on posterior tibial or medial ankle taping. The end result should really stabilize the lateral ankle and most patients can master the technique themselves or with the help of a partner. 


Friday, May 28, 2021

Negative Cast Pouring Position: 3 Typical Scenarios

This evening I am pouring plaster of Paris liquid into the negative cast to make a positive cast. Tomorrow I will begin the process of correcting that positive to a shape I desire to help with the patient’s pronation pattern. I have 5 pairs of casts to deal with this weekend, and this left foot, shown in 3 possible positions, is my most pronated foot of the 10. The RCSP, or resting heel position, in the patient is 12 degrees everted to the ground. The forefoot to rear foot measurement during my examination was over 10 degrees fore foot varus. The first method of cast correction is an ASIS correction. Therefore, you pour the cast at this 12 degree everted position. Although this is a very pronated subluxed position, it is assumed the foot pronates even further when standing. You are pouring, or correcting, this foot in a position of severely pronated, but you are not attempting to create a new arch (sometimes a great challenge), and you are stabilizing this foot with arch re-enforcement, deep heel cups, posts to add motion and stability, etc. This is a viable method especially with shoe fit issues, or previous arch intolerance. More in later posts. 


This same foot can be poured vertical, the classic Root technique, attempting a 12 degree change (12 degree everted to vertical). Of course this does not happen, but the orthotic made off this Root Balanced device, will be be changing and stabilizing the foot. I typically found a great need for orthotic adjustments with dispensed these for this foot, as the force of correction was too much in the soft tissue of the arch and forefoot. I began expert in making them comfortable with compromise, thus needing a new orthotic within the year as the forefoot varus (supinatus) begun less. Again, more in a later post. 

Here, this same left foot, which stands 12 degrees everted in resting position, is being poured at 20 degrees inverted to make the Inverted Orthotic Technique. With this technique, the arch is filled in to not block first ray plantar flexion vital for propulsion (per Dr Dananberg). 20 degree correction will typically change the heel valgus position from 12 everted to 8 everted. All the other good orthotic device stability measures: plastic thickness, deep heel cups, full shoe width, zero post motion, all help in making this a very stable device. Again, more in a later post. 

     Here I summarize 3 orthotic negative cast pouring positions that I have used to help with pronatory symptoms and stability. 3 different pouring positions from the lab are used for this severely pronated left foot where the fore foot varus equals the RCSP (not an uncommon issue). I propose that good/great stability to the foot will be accomplished by all techniques. I recommend re-casting a foot like this 6 months to a year after dispensing the orthotic devices (you should get a reduction in fore foot varus angulation). I firmly believe that if I can produce angular change (say 12 degrees everted resting position towards a vertical heel), overall the patient will be better off unless they have rearfoot valgus (like genu valgum). 


Thursday, May 27, 2021

Common Advice for Plantar Fasciitis

Hey Dr. Blake, 
A couple of days after seeing you last week, my left foot started hurting.  The pain is on the inside of the foot right where the heel meets the arch (and is confined to a very small area).  From my amateur research it appears to be plantar fasciitis, but you are the expert.  It is not very painful -- more sore than sharp in terms of pain.  I have researched some stretches and have been icing it.  It seems fine when I exercise on my stationary bike.  I am wondering if I should avoid walking (and the bike) or whether non-strenuous walking would be fine.  Also, whether there is anything more I should do.  I could not get an appointment with you until September (between my schedule and yours) and the pain is really not bad (more bothersome than anything else).  Except for sharp pain in my left heel a couple of months ago that lasted only 2 days, I have not had any plantar fasciitis-like symptoms before.

Hope you are well.  Any advice you can give would be appreciated.  Thanks.
Dr. Blake’s comment: 
  Here is my office handout of general rules. I think your exercising is fine, but do not push through pain. Ice after workouts, and several times a day. Do the plantar fascial wall stretch on my blog. Let me know in a month how you are doing. Rich 

Plantar Fasciitis 

The top 10 common treatments for plantar fasciitis are:

1. Plantar fascial wall stretches for 30 seconds 5-10 times/day.

2. Rolling ice massage for five minutes 2-3 times/day.

3. No negative heel stretches.

4. Avoid barefoot walking (something like Dansko sandals at home).

5. OTC or custom orthotic devices to transfer weight into the arch (you must feel that the heel is protected and weight is in the arch).


6. Physical therapy or acupuncture (two times/week for four weeks and then re-evaluate).

7. Posterior sleeping splints when morning soreness lasts over five minutes (these can be used at any time as rest splints when you are going to sit for 30 minutes or more).

8. Low dye/arch taping daily initially and then with strenuous activity.

9. Activity modification to avoid “bad pain.”

10. Calf stretches (straight and bent knee) two times/day.


Tuesday, May 25, 2021

General Injury Advice: Email Correspondence

Hello Dr Blake , 

Hope  you and your loved ones are doing well and keeping fit.

I had an injury in my medial sesamoid  of the left foot in 2016 , after a very difficult year things settled with your advice (this patient lives in India) . Used Exogen , Hoka shoes with orthotics. Past years I had pain in the forefoot ,off and on , but nothing I could not manage . Was regular with strength exercises till a year back .Now the gyms are shut .

A few weeks back , I cycled out side for some days . Was fine for a few days but then developed a lot of pain in my foot ( same foot). I have pain in the forefoot and also in the heal ( it’s a heal spur I think)  The  heal pain is worse when after resting I get up and walk. 
Dr. Blake’s comment: This is classic plantar fasciitis and I refer you to the various blog posts on that subject.
I have started with contrast bath.

Need your help as to how to bring down the pain . 
Dr. Blake’s comment: The next 3-4 weeks you want to quiet everything down with the Hokas again, limited activity, a boot for 4 hours a day if you have one, and ice the sore areas for 10-15 minutes twice daily. Stay the contrast baths for evening. 
I am almost 49 years old and a diabetic since many years - I would like to know how can I -

1) bring back the lost muscle to my calf and thigh?
Dr. Blake’s comment: Some of the muscle loss will have to wait until you can do quad and hamstring strengthening in the gym. You can work on your abs with sit-ups, and calf with single heel raises each evening. Do single leg balancing every evening also for 2 minutes and metatarsal doming 3 times a day a set of 10. This will be a good start. 

( lost due to immobility during sesamoid injury & another injury in the right leg atrophied thigh muscles)

2) how to deal with the heal pain and pain in the forefoot?
Dr. Blake's comment: Hopefully, the Hokas can cushion and decrease the bend at the ball of your foot. Hard to know by that description if you should be doing anything else, or what the problem is. 

3)is it okay for me to do heel drop and heel raises?
Dr. Blake's comment: You know I hate heel drops in general. You can do the heel raises but see how the front of the foot feels. Sometimes when you go up onto the ball of the foot in a heel raise you have to off weight a sore area. Exercises should never be painful. 


**When we do calf raises with a well made of books to off weigh the sesamoid , I feel only the sesamoid is suspended and the body weight is still on the sesamoid , is it so?
Dr. Blake's comment: The well is to off weight (so no impact stress), but there will still be tensile force on the sesamoid (therefore you still have to use pain as your guide). 


3) my legs are quite lean overall ,what all exercises are safe for me to do to keep my foot and  leg  strong for the coming years .( keeping in mind the sesamoid foot -left side and the knee with arthroscopy- right side ).
Dr. Blake's comment: You can cycle with low tension at first to see how your knee handles it. You must raise the seat somewhat from normal to be kinder on your knee. You can elliptical, just stay flatfooted to protect the sesamoid. You can walk, and walk, as long as you can do so in the hokas and good orthotic devices. I sure hope this helps you. Rich 

Stay safe and healthy . 


Thanks and regards

The Patient then replied several days later:

Thank you so much for your reply Dr Blake.

Was just now going through your reply.Since you’ve recommended 3 to 4 weeks of limited activity , do I start the leg balancing , metatarsal doming , heel raises and cycling  now or after a month .Is a stationary cycle preferable than going out biking?

         Dr. Blake’s comment: Start the exercises now as I think you can start getting stronger. It is also okay to use any form of biking, inside or out, unless you have a lot of intense hills or treacherous uneven ground to pedal through.  


There are these range of motion and foot strengthening videos on your blog , should I start now ?

         Dr. Blake’s comment: Yes, put listen to your foot while doing them. Also, start with 15 minutes no matter what of the exercises, and 30 minutes of biking to see how you do. Every fourth workout go up 5 more minutes.  


Should I be doing the classic planter fasciitis stretching with toes bent , since I had my sesmoid injury in the same foot? 

         Dr. Blake’s comment: That is correct, avoid this for the time being due to the prolonged stress on the sesamoids.  


What are the exercises and poses I should avoid because I had the sesmoid injury and now I have the planter fasciitis?

         Dr. Blake’s comment: Really any exercise that puts prolonged stress on the ball of the foot. Like the downward dog position or planks. These would have to be modified.  


I was trying to donate to the blog using my credit card but I keep getting the message  - “ Donations to this recipient aren’t supported in this country .” Can this be fixed ?

         Dr. Blake’s comment: I know the link does not work internationally, but I appreciate the good thoughts.  


Monday, May 24, 2021

Achilles Injuries when more than "Itis": Partial Tears and Tendinosis (Dr. Blake's Office Handout)


The following is my office handout for patients who present with more than inflammation to the achilles called achilles tendonitis. The tendon typically is swollen compared to the other side, and the pain is more than in "itis" situations. Tendinosis is typically chronic, where partial tears can be acute or chronic. 

Achilles Tendinosis and Partial Tears 

     Achilles Tendinosis implies that the tendon is damaged more than inflamed (like in Achilles Tendinitis conditions). Partial Tears are part of this condition that drives everyone, doctor and patient, bananas. There are so many degrees of tendon disease. MRIs, if possible, should always be done to document what is going on. The top 10 treatments for achilles tendinosis and partial tears are:

1.      When the tendon is thicker than normal, or swelling that will not go away, consider an MRI to check if a partial tear is present.

2.      With tendinosis, some form of immobilization is important to create a pain free  environment (tape, below knee cam walker, AFO, high top boot).

3.      With a partial tear of the achilles tendon, 3 months of cam walker/removable boot is crucial (when a pain free situation cannot be obtained with activity modification).

4.       With tendinosis, physical therapy can occur at the same time as the immobilization, but with a partial tear, physical therapy normally starts after the 3 months of immobilization.

5.        Both of these conditions may require surgery, so a surgical consult should be done to evaluate options (so that the patient is aware of their upcoming choices).   

6.       As the tendon gets less sore with icing for 5-10 minutes 3 times per day, gradually begin to strengthen. I love 2 positional heel raises up to 100 each evening as long as there is no pain, gradually leaning to the injured side, and gradually progressing to 25 one sided calf raises.


7.      Achilles tendon stretching, both straight and bent knee, should be done painlessly 3-5 times a day.

8.        PRP injections is a rising star in medicine, in an attempt to hopefully avoid surgery, may be considered.

9.       Like in all cases of achilles pain, heel lifts and custom orthotic devices are standard.

10.    Avoid barefoot and negative heel positions for a year following the Return to Activity Phase.

When the heel drops below the plane of the ball of the foot, it is considered in a negative heel position, and can get over stretched and re-torn.

Sunday, May 23, 2021

Dr Blake's Transition into Part Time Practice

     Yesterday I announced on Facebook, to my friends, that I had just finished working full time and would be transitioning into a part time practice. There will be an unfortunate delay to see me for my patients. I had hoped for an easier transition, but circumstances do not allow that. 
     When I announced my decision, I got an incredible "Good Job" from podiatrists, patients, and friends. I have worked hard these forty years, 42 years ago I graduated from the California College of Podiatric Medicine. I had incredible mentors, most have passed, and incredible colleagues with some continuing on brightly. 
     I hope I have helped my readers through this blog these last 11 years. It has been an incredible journey. Now, with working part time, I hope to have more time to spend with you through this blog. After seeing patients all day, it was hard at times to sit down to write. I will not have that as an excuse. 
     In the fall, most likely October 2021, I will be able to take questions again. I appreciate your patience with me. I learned about Podiatry in the fall of 1975 when I visited Dr Harry Hlavac's office in Mill Valley, California. I have never looked back at my decision to follow him into this wonderful profession. 
     Thank you again for being a vital part of my journey. I will try to continue to write about I feel is important. Thank you and God bless. Rich 
                                                                        Wish me luck!!

Achilles Strengthening Progression from 2 sided to Single Heel Raises Video Presentation


https://youtu.be/HqAQ1SEP61c

<iframe width="560" height="315" src="https://www.youtube.com/embed/HqAQ1SEP61c" title="YouTube video player" frameborder="0" allow="accelerometer; autoplay; clipboard-write; encrypted-media; gyroscope; picture-in-picture" allowfullscreen></iframe>

The video above discussed the aspect of achilles injury rehabilitation as the patient advances to weight bearing exercises. This can be many months after an injury or just following an injury. It is so important to find the right amount of strengthening any injured patient can do safely from day one of your involvement with their rehabilitation. I hope you can appreciate the subtleties presented. 


Monday, May 17, 2021

Sesamoid Fracture: Dr. Blake's Office Handout for Patients

In my office, I have developed many handouts to give to patients for many topics. Since I treat so many Sesamoid Fractures, I thought I would share this one. Rich 

Sesamoid Fractures


The top 10 initial treatments for sesamoid fractures are: 

  1. Exogen bone stimulator for 6 to 9 months

  2. Removable boot or a stiff soled shoe like Bike Shoes with Embedded Cleats for 3 months to create a consistent pain free (0-2 pain level) healing environment.

  3. Ice pack twice daily and contrast baths each evening for anti-inflammatory and deep bone flushing. Do the contrast baths twice on non-work days.

  4. During the initial 3 months of immobilization, have orthotic devices developed that off weight the sesamoids.

  5. Learn how to use 1/8th inch adhesive felt from Moore Medical to make dancer’s pads for the boot and for post-boot action.

  6. Learn how to spica tape for post boot action

  7. When you are not wearing the boot, avoid barefoot.

  8. Do cardio, core and foot and ankle strengthening the minute you hurt the bone, and on a daily basis. Keep Strong and Keep Fit!!

  9. Since we are dealing with bone metabolism, make sure your calcium and Vit D intake is good, and get counseling if you think that there might be a bone density issue.

  10. Use strict activity modification principles to keep the pain levels between 0-2 as you go from boot to regular shoes. The weaning out of the boot period can take anywhere from 2 to 6 weeks and no added soreness is allowed.


So, what do we know about sesamoid injuries that may help? Here are my top 20 plus pointers when teaching about sesamoid fractures.

  1. They almost always heal.

  2. Even with normal healing, they can take up to 2 years so patience is a virtue here (some fast and some slow, and all patients want the fast ones).

  3. Healing, and feeling better, is based on many factors that are unknown when the patient first presents.

  4. MRIs and CT Scans are common imaging techniques that can really elucidate the problem, and sometimes change the direction of the treatment.

  5. Follow up MRIs, when needed to check healing, are often done between 5-6 months after the first baseline MRI.

6.               The MRI can show initially that you are not dealing at all with a sesamoid fracture, but something else, and prevent treating the wrong diagnosis (self pay MRIs of this area are $750 (2021) in the San Francisco Bay Area).

7.               Since we are dealing with bone, we must look at diet, Vitamin D3 levels, calcium/zinc/magnesium, and bone density.

8.               Treatment of sesamoid injuries flows through 3 phases that are normally overlapping--Immobilization, Re-Strengthening, and Return to Activity.

9.               When the patient is in the Immobilization phase, the treatment visits should be thinking about (and acting on) the Return to Activity Phase with visits dedicated to shoes, orthotics, strengthening, cardio.

10.           Oftentimes treatment mistakes involve having the patient in the wrong phase (like return to activity when they should be in the Immobilization phase).

11.           One of the crucial aspects of treatment, that can be hard to design, is protected weight bearing inserts and shoes.

12.           As treatment starts, the patient is placed in an environment (be it cast, shoes, orthotics, boot, etc) that maintains 0-2 pain level.

13.           The initial goal is to create this pain free environment for 3 months by whatever means it takes.

14.           Non weight bearing (via crutches or scooters to off weight one leg) always increases swelling, so some protected weight bearing is crucial. Every step pushes fluid out of your foot.

15.           The best way for reduction of bone swelling is contrast bathing. Typically, icing twice daily and contrast bathing each evening is needed.

16.           If you are basing treatment on x-rays alone, you may be way off base.

17.           Do not let the joint freeze up (frozen toe syndrome) with routine pain free range of motion or mobilization techniques. Go to YouTube and type drblakeshealingsole Self Mobilization.

18.           Start strengthening the minute you get injured, or at least after you read this, even if it takes some modification for pain. Go to YouTube and type drblakeshealingsole foot and ankle strengthening playlist. Keep the joint/foot flexible and strong.

19.           Patients with sesamoid injuries are prone for setbacks so do not get discouraged.

20.           If you have a sesamoid fracture, one of the hardest fractures in the foot to heal, get a bone stimulator and begin using. Some insurance companies require 3 months wait to document delayed healing, some not. Self pay for Exogen Bone Stimulator is around $750.

Sunday, May 16, 2021

Peroneal Tendon Mechanical Treatments Summary

In 2022, my new book on treatment of lower extremity injuries will be based on mechanical treatments. The following summary is from that book entitled “Practical Biomechanics for the Podiatrist”.


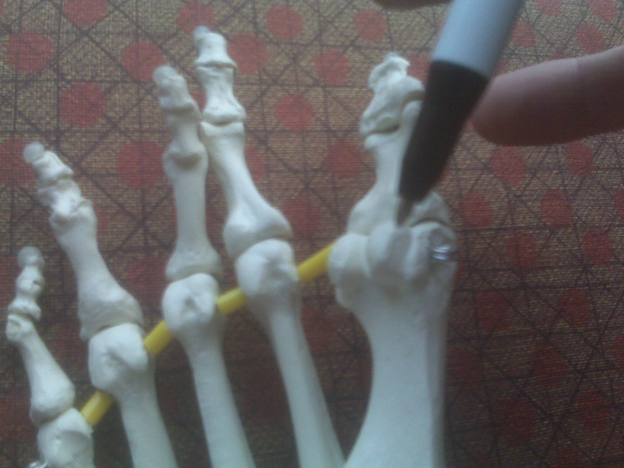
Common Mechanical Changes with Peroneal Tendon Problems

  1. Cam Walker with or without Crutches for Immobilization Phase

  2.  Ankle Braces galore!!

  3. High Topped Boots

  4. Valgus Wedges

  5. OTC Inserts Customized to Stability Needed

  6. Arch Taping 

  7. J Strap with Leukotape for Supination Support

  8. Peroneus Longus and Brevis Strengthening Program

  9. Metatarsal Doming and Single Leg Balancing

  10. Mechanical Changes to Avoid Excessive Supination in Sports

  11. Orthotic Modifications for Supination Support


     Cam Walker with or without Crutches for Immobilization Phase is of course based on the severity of the injury presented to you. What will it take quickly to get the presenting injury to 0-2 on the pain scale. Will that take getting off the foot with crutches? Will a Cam Walker below the knee in length for peroneal problems be needed? How is the patient in terms of limping, black and blue, swelling, or feelings of functional instability? All of these will help your decision. 

     Ankle Braces galore abound in the marketplace. I like braces that are adjustable in tightness, so that if you swell more than normal, you can still use them. I also like braces that the patients can make tighter or looser depending on the need. Simple slip on braces have no purpose other than some slight compression for swelling. The goal of the braces or boots below is to rest the peroneals which have an injury. 

     High Topped Boots can be an immediate fix for instability, or mechanical compression of the injury. Many patients have a peroneal injury and get incredible comfort from a fashionable boot, or men with cowboy or hunting boots. 

     Valgus Wedges can be stand alone inserts, typically ¼ inch high, or attached to the shoe insole, midsole, or outer sole. A valgus wedge is rarely to pronate (rarely), and normally to place enough force on the lateral side of the subtalar joint axis to prevent supination at heel contact (also called lateral instability). The lateral instability, which may be due to structures like plantar flexed first rays or tibial varum, can be the cause of the peroneal strain in the first place, and the reason the peroneal tendons remain sore if not eliminated. 

     OTC Inserts Customized to Stability Needed in my practice are typically Sole or PowerStep. I love them since I can customize based on the biomechanics of the patient. The ones I use have no plastic making customization easy. If lateral instability or excessive pronation, or both in my medial-lateral instability patients (everted forefoot deformities in some), is the apparent cause of the peroneal strain then I attempt to fix it with these inserts and some customization of wedges, etc. 

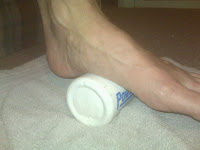
     Arch Taping works for peroneal strain when an unstable cuboid is causing the peroneal tendons to strain, but it could be that you're anchoring the peroneal tendons down some, and giving them stability. I prefer the circumferential wrap with Kinesiotape or RockTape over the low dye for this function, but both may work fine. 

     J Strap with Leukotape for Supination Support is the opposite version we discussed for pronation support. It is typically used for ankle instability (pre-surgery, post-surgery poor result, in the early stages of a great re-strengthening program) when you want the tape to do the job of the lateral ankle ligaments. The peroneal tendons are straining to do the most they can do, so the tape should help the peroneals relax. The coverall is applied first from under the medial malleolus, and then under the heel, finally up the lateral side of the heel to about 14-18 inches above the ankle. Then, the slightly narrower Leukotape is applied with no tension medial heel and plantar heel. As you pull the Leukotape up the leg on the lateral side of the foot and ankle, you place the ankle slightly everted to the subtalar joint neutral position. The higher up the leg, the more the stress is taken off the ankle and peroneal tendons. 

     Peroneus Longus and Brevis Strengthening Program is typically a resistance band program that will be discussed later. You can start on your first visit with a peroneal active range of motion or peroneal isometrics. There should not be pain with these either during or after. The progression of strengthening can be a 6 month endeavor with monthly follow up visits. Until the patient is doing 2 sets of 25 at Level 6 of the resistance bands, they need either bracing or taping during a high risk activity (like return to basketball). 

     Metatarsal Doming and Single Leg Balancing can be found on the blog easily.

     Mechanical Changes to Avoid Excessive Supination in Sports should be in place until their injury is healed, you have mechanical devices in place in terms of wedges or orthotic devices, and until the peroneal strength is great. For a golfer, it may be avoiding the uphill lays in the back foot injuries. For a tennis player, it may be the extremes of the side to side volleying. For a basketball player, it may be leaving their feet on a drive that has to be avoided. For a ballet dancer, the mechanics of their en pointe work should be evaluated. This list goes on looking for the signs that the peroneals could be overly stressed.

     Orthotic Modifications for Supination Support are many and take awhile to know what to add to the mix. If the patient is an over supinator or just has marked lateral ligament laxity or severe peroneal weakness, and this patient has peroneal problems, you want to add to your orthotic prescriptions the normal ingredients to stop over supination: high lateral heel cups (25 mm or more), lateral phalanges, Denton modifications, any forefoot valgus support captured in the cast, and even 2-3 degree everted pouring when the force is severe.