The following is an excerpt from Chapter 6 of Book 2: Practical Biomechanics for the Podiatrist
https://store.bookbaby.com/book/practical-biomechanics-for-the-podiatrist1
Accessory Navicular Syndrome

CT scan image of an Accessory Navicular
The accessory navicular is part of the
navicular bone, a second ossification center, that never fuses with the main
part of the bone. It starts to form around 8-9 years old and is fully formed no
later than 16 years old. 10% of your patients will have them and 30% of those
will have them on both sides. The prominence caused by this accessory bone has
been called the second ankle bone, os tibiale externum, or os navicularis. When
they begin to hurt, it is important to actively treat, as a percentage will
need surgical removal. The pain can be from the the posterior tibial tendon
attachment, from the junction of the accessory and main part (either
syndesmosis, synchondrosis, or synostosis), from obvious shoe pressure like
from a bunion deformity, or from symptoms arising from the arch collapse. One
of the main reasons the medial arch stays strong is the incredible anchoring of
the posterior tibial tendon first into the navicular and then spreading out
plantarly across the midfoot. If you disrupt this in any way, by having a small
amount of the posterior tibial tendon diverted into the accessory bone instead,
the foot can strain to hold up the arch and pain ensues. A definite weak spot
is created.
To tie this into Chapter 3 and 4 on gait
and biomechanical examinations, when a patient presents with accessory
navicular syndrome, the most important
examinations to do in 10 minutes (or 20 minutes) are:
● Signs of Excessive Pronation and
Medial Column Overload
● Medially Deviated STJ Axis
● Functional Hallux Limitus
● Posterior Tibial Strength
● RCSP
● AJ Dorsiflexion
Common Mechanical Changes for
Accessory Navicular Conditions (with the common ones in RED)
- Cam Walker with or without
Crutches in the Immobilization Phase
- Inverted Orthotic Devices or another high
medial support Orthotic Device (like the Mueller PTTD device)
- Circumferential Taping with a
Hole Cut Out for the Prominence
- J Strap with Leukotape for
Pronation Control
- Progressive Posterior Tibial
Strengthening Program
- Metatarsal Doming and Single
Leg Balancing
- Strengthening of the 2 Long
Flexors
- 2 Positional Single Leg Heel
Raises
- Off Weighting of the Prominence
(including shoe modifications)
Cam
Walker with or without Crutches in the Immobilization Phase may be your
first treatment. Its mechanical function is in immobilization. If you suspect
this problem, you need to err on the conservative side since the problem can
lead to surgery if correctly or incorrectly treated. Any patient who first
presents with a problem in my practice, that may need a surgical intervention,
raises my red flags. You do not know how the injury is going to turn out.
Usually looking at the prominence at first sight, before you take x- rays, you
are going to know that you are dealing with an accessory navicular (or
gorilloid navicular), and that some of these will require surgery. My goal is
to get the patient to level 2 pain as quickly as possible on a consistent
basis. If that requires a boot and time off work to drive the pain to 0-2, so
be it. The goal is to create an environment that will allow them to heal. The
crutches may be necessary initially as I experiment with tape, design an insert
for the boot, or work on their inflammation. It is important to remember an
EvenUp when you use a Cam Walker.

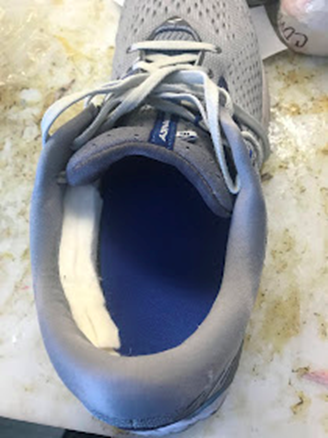
Here an EvenUp slips over the side
not being immobilized to level the hips some
Practical
Biomechanics Question #302: 3 patients present with accessory navicular pain
with 3 different scenarios. Match the pain with the Phase of Rehabilitation.
- Pain walking each step
- Pain only when attempting to
run
- Pain only at 3 miles into
running
Inverted Orthotic Devices or another high medial support Orthotic Device
(like the
Mueller TPD Foot Orthosis) is
crucial quickly to stabilize that medial column. Their mechanical function is
in reducing pronatory forces on the injured tissue. I am not an advocate of
pre-fabricated orthotic devices for children who present with this problem
regularly. If a growing child needs an orthotic device, I feel it should be
designed for them as exactly as possible. Since most patients who present with
significant problems from accessory navicular are juveniles, I discuss with the
parents why we have to protect them, even if surgery is needed. I discuss that
the presence of this problem will be a weak spot their entire lives and custom
support is so crucial. In my book entitled “The Inverted Orthotic Technique” I
discuss how this is prescribed.
This shows the high medial column
support from an Inverted Orthotic Device
Practical
Biomechanics Question #303: How much inversion is placed into an Inverted cast
to change the foot position one degree?
Circumferential Taping with a Hole Cut Out for the Prominence is typically made from kinesio tape
or RockTape perhaps 12-14 inches long and 2 inches wide. Its mechanical
function is in light immobilization and support of the injured tissue. Before
the tape is placed on the foot, and even without the backing removed, about 1
inch from the start a one inch diamond is cut in its center. The backing is
then removed. The one inch diamond cut is placed over the medial prominence as
the tape is applied gently over the dorsum of the foot from medial to lateral.
When you get to the plantar surface of the foot, the tape is now pulled with
“some force” from lateral to medial and up back to its origin and a little
further usually slightly more distal (not an exact overlap so it grabs more
skin). This type of tape needs to be rubbed in for a minute to activate the
glue. You have to play with the tension implied by “some force.” The patient
can learn this skill and the tape typically lasts 3-4 days.

Leukotape J Strap to create
supination moments placed on with the foot slightly inverted and the Coverall
protects the skin
J
Strap with Leukotape for Pronation Control is the most powerful way of
taping for posterior tibial problems, including accessory navicular issues. Its
mechanical function is in reducing pronatory moments across the injury and
slightly immobilizing. Leukotape is by far the strongest tape I use. It is so
strong, it has to have a layer of material called “Coverall” applied to the
skin first. No Leukotape should ever touch the skin. Leukotape and Coverall are
typically sold together with the Leukotape slightly narrower. Both types of
tape of course are applied with the same pattern and it is called a “J Strap”.
Occasionally, I tell patients to use 2 layers of Coverall overlapped by 50% to
make a wider base to place the Leukotape on with. The tape is started just
under the lateral malleolus and brought down and under the heel with no
tension, then the foot is slightly inverted to neutral subtalar joint, and the
tape is brought up medially over the accessory navicular and up at least 18
inches up the leg. The longer up the leg, the more you are spreading the force
to stabilize over a bigger area. Again, like the circumferential taping, this
tape should last 3-4 days before being removed. You typically remove it at
night, so that you can rest your skin, and re-apply in the morning. It can be
used in all of the Phases of Rehabilitation, with some of my recovered patients
still using it for long backpacking trips months later.
Practical
Biomechanics Question #304: Explain why some immobilization of the ankle is
needed at times for an accessory navicular problem.

Resistance Bands exercise to isolate
the posterior tibial tendon with inversion and ankle plantar flexed
Progressive Posterior Tibial Strengthening Program is part of the Re-Strengthening
Phase of this injury and vital to its success. Its mechanical function is to
strengthen the posterior tibial fibers attaching into the navicular stabilizing
the area. Chapter 11 (Book 3) will go through the aspects of strengthening for
injuries, so I will just make three points here I want to highlight. First, the
goal with all accessory navicular patients, is to progress them to 2 sets 25
repetitions at Level 6 resistance band. This can take months to accomplish so
the health care provider has to be clear with the patient that even if they do
not hurt, if they remain technically weak, that they can break down again.
Second, the posterior tibial nerve which runs right next to the posterior
tibial tendon, can make the exercises hurt. I always tell a patient if an
exercise hurts they could be hurting themselves. This does not seem to include
many patients strengthening their posterior tibial tendon. So, you have to have
them do the exercise, and if there is no problem within the first 2 days, have
them continue. For that reason, I have them strengthening the posterior tibial
tendon every other day initially to check their response. And third, if you
rely on anyone else to show your exercises, always check at the first visit.
The posterior tibial tendon is strengthened with the ankle plantar flexed
(pointed) and the foot inverted (abducted). Over half the time when I check the
patient is not doing the exercise correctly.
Practical
Biomechanics Question #305: What tendon are you strengthening if the foot is
inverting against resistance, but the ankle is in neutral to dorsiflexed?
Metatarsal
Doming and Single Leg Balancing have both been described multiple times,
including the last section on Cuboid Syndrome. Their mechanical function is to
stabilize the injured area with muscle strength increases. Typically, with
accessory navicular patients, metatarsal doming can be started immediately to
keep the foot intrinsics in tone. The Single Leg Balancing is quite jerky and
added at the end of the Re-Strengthening Phase or early in the Return to
Activity Phase. You typically want the patient at Level 4 or 5 of the
resistance bands before starting single leg balancing to ensure that they are
strong enough.
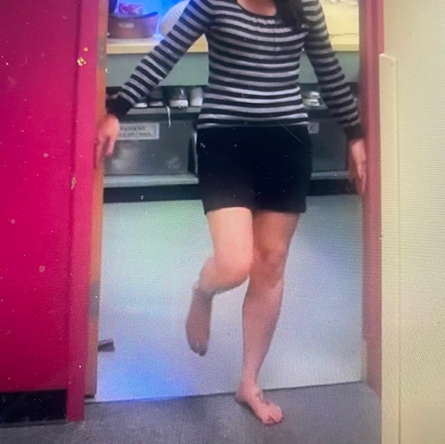
Single Leg Balancing with Light
Touch on Door Frame
Strengthening
of the 2 Long Flexors is basically to help the posterior tibial tendon in
its ankle plantarflexion and inversion functions, and probably some with arch
support. Its mechanical function is to strengthen agonist muscles to the
posterior tibial tendon. The posterior tibial tendon, along with the 2 long
flexors, run alongside each other under the laciniate ligament under the medial
malleolus. They have shared functions, so our strengthening should take some
strain off the medial tissues. The classic toe curl exercise, where you build
up to 100 curls of the toes as you grab the towel and pull it backwards, is a
perfect way to strengthen the two tendons.

This is a common gym version where a
Bosu Ball is used to balance on single and double legged. The toe flexors can
be activated as you lean forward and try to maintain your balance.
2
Positional Single Leg Heel Raises is one of the most powerful exercises you
can prescribe and an important monitor of the success of a patient. Their
mechanical function is to strengthen the foot and ankle taking stress off the
injured area. The ability to do 25 straight knee (gastrocnemius) single heel
raises and 12 bent knee (soleus) single heel raises is an indicator of the health
of the tissue. However, it is more for the Return to Activity Phase, or later
aspects of the Re-Strengthening Phase of Rehabilitation. When the patient
presents with accessory navicular syndrome, the testing of whether they can
perform a Single heel raise on that side is crucial. It has to be painless. As
soon as your heel lifts from the ground, in the next ¼ of an inch of heel rise,
the posterior tibial tendon will pull hard on the navicular to assist that heel
raise. It is an important overall exercise as the gastrocnemius and soleus
supinate the subtalar joint strongly, but it is also an important exercise to
sense the strength or frailty of the accessory navicular complex with the
posterior tibial tendon.
Practical
Biomechanics Question #306: What muscles/tendons will help a weak achilles
tendon to lift the heel off the ground (any of these structures can be injured
because of this)?
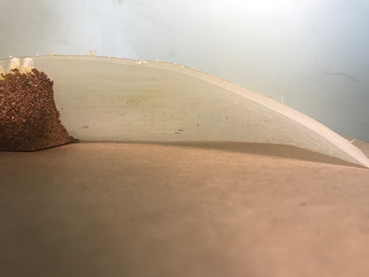
Off
Weighting of the Prominence (including shoe modifications) is of course
really common in ice skaters when they make custom boots and downhill skiers.
Its mechanical function is to off weight the sore area. From the age the
accessory navicular completely forms, they can become shoe fit nightmares or at
least projects. Besides the shoe fitters tasks, on a daily basis the patient
may need the use of some ¼ inch adhesive felt to off weight the prominence. The
two common ways are 1) a one inch square piece above or proximal to the
prominence, and 2) an “upside down smile” making a tent around it, but as close
to it except plantarly. This usually is only needed for shoes which seem to
bother it. I tell my patients, like my bunion patients, if they remove the shoe
at night and the tissue is red at all, the habit of protecting it in those
shoes should begin.
Here a double layer of ¼ inch
adhesive felt is applied proximally in the shoe to off weight the sore point.
No comments:
Post a Comment
Thank you very much for leaving a comment. Due to my time restraints, some comments may not be answered.I will answer questions that I feel will help the community as a whole.. I can only answer medical questions in a general form. No specific answers can be given. Please consult a podiatrist, therapist, orthopedist, or sports medicine physician in your area for specific questions.